

| Tutorial navigation (Using the VIGRA under Windows with Dev-C++) | ||
| Table of contents | 2 The first VIGRA program: converter > | |
1 Installation under Windows using Dev-C++
If you plan to use the VIGRA under any Linux, UNIX or Mac OS, this howto cannot help you. Please take a look at the: VIGRA-Reference-Manual (Installation) for more information about these platforms.
Dev-C++ is a free C/C++ Integrated Development Environment based on the MinGW (Minimalist GNU for Windows) compiler. It comes with a ported version of the famous GNU g++ Compiler for windows, which results in a very similar behaviour of the compiler compared to g++. You will notice this by the occurence of similar error messages, compilation behaviour and the use of makefiles. Furthermore Dev-C++ brings with an integrated debugger, partial sytax completion and syntax-highlighting, just to call a few advantages.
The following steps describe the Installation of the VIGRA library using this development environment.
- First of all download Dev-C++ here: Dev-C++ 4.9.9.2alpha mit GNU C++ 3.4.2
(Don't be afraid of the alpha status, it is running quite stable) - Now, please download the Dev-C++ VIGRA (1.5.0) package here.
- Install Dev-C++! You do not have to set any parameters, just install it with default settings, e.g. at "C:\Programme\Dev-Cpp\".
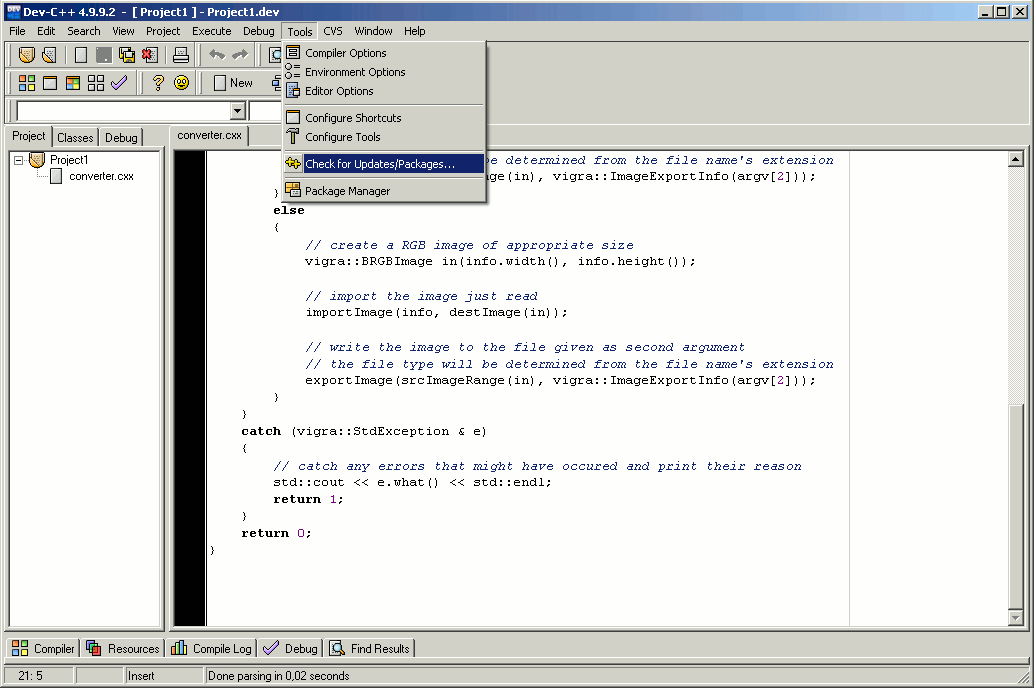
- After the successful installation you have to configure Dev-C++. Therefore, please go to the menu entry "Tools->Check for Updates/Packages" (see here)
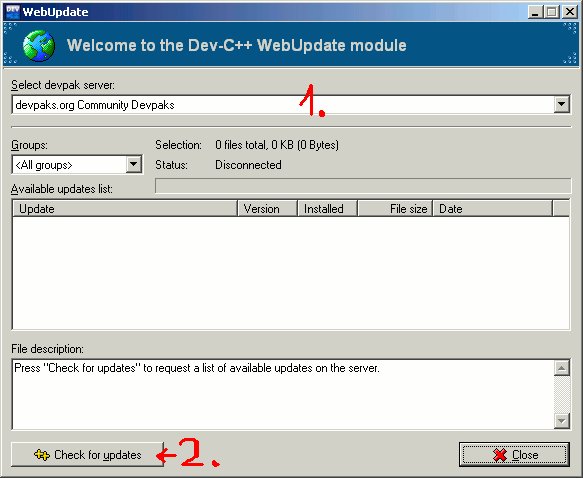
- Now, the web updater of Dev-C++ starts up. Please select the community server and click the button named "Check for Updates" to get a list of all available packages (see here).
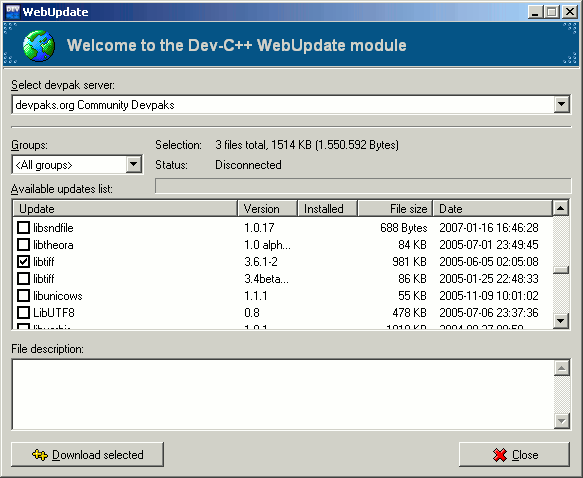
- Before installing the VIGRA, we have to install some dependent packages. Due to the intra-dependencies between these packages, we have to install them in two different steps.
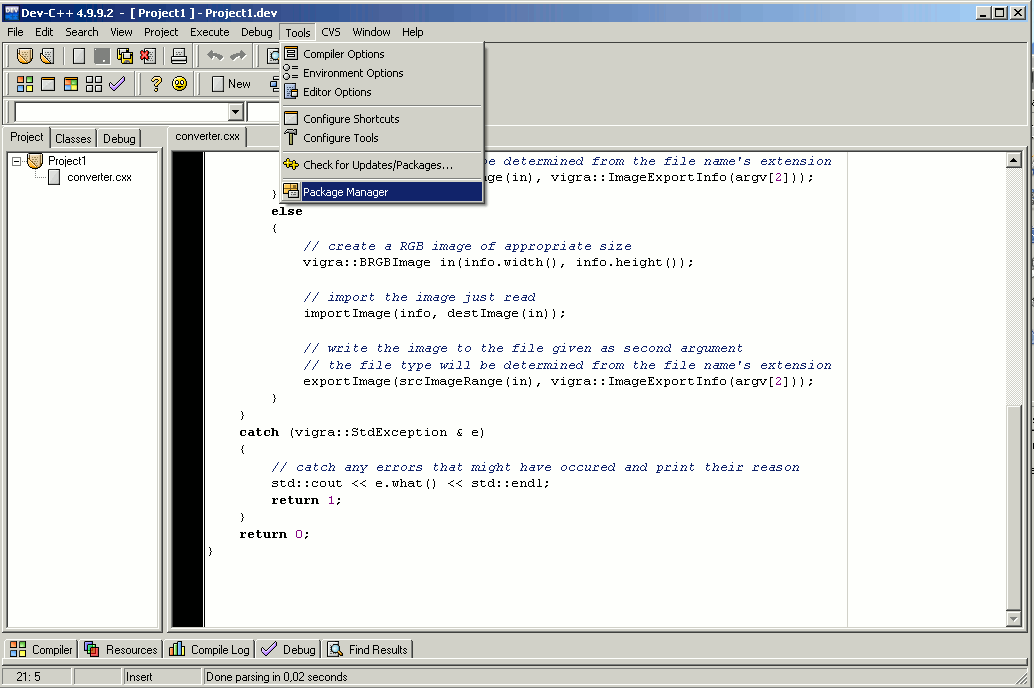
- Now that we are coming closer to the target! The only thing left is to install the VIGRA (version 1.5.0) itself. To install the package, you have to select the menu entry "Tools->Package Manger" of the main Dev-C++ window (see here) to open the package manager. If all dependent packages were installed correctly, it should look like on this image (without the DevPack-Maker).
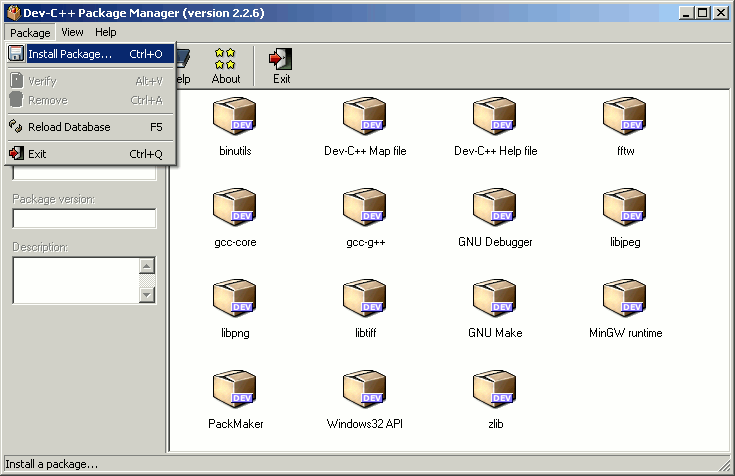
- Inside the package manager, you will have to add VIGRA package, you downloaded at step two. This is done by the "Package->Install Package" command (see here)
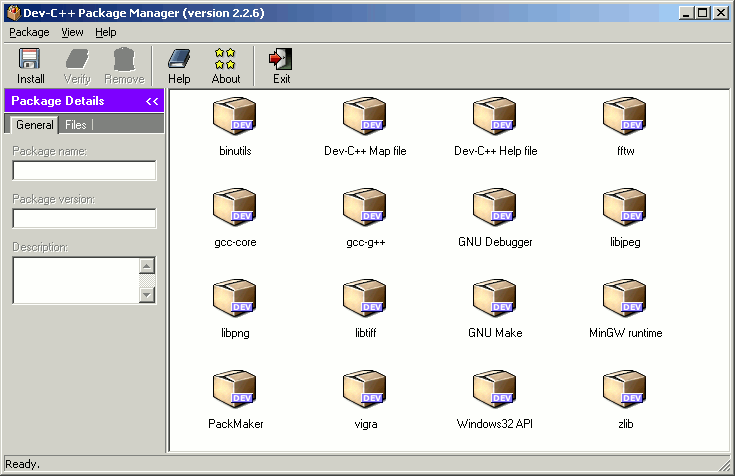
- If this last package was installed successful, the packages should look like on this image (without the DevPack-Maker).
If everything looks like the last image, you can now proceed with the second part of this tutorial.